Tuesday, October 31, 2006

10 Uses for Beeswax

  1. Unstick a drawer. A thin coat of beeswax on wooden rails makes the wood drawers on Granny’s old bureau slide smoothly. It does windows, too. Use wax to lubricate sashes.
  2. Free frozen nuts. Help loosen a rusted nut by lubricating the bolt’s threads with melted wax.
  3. Wax wood. For structural elements that need to look good but take no wear (such as exposed ceiling beams), heat equal parts beeswax, linseed oil, and turpentine. Apply with a burlap rag while the mixture is still warm.
  4. Preserve bronze. To ward against oxidation caused by moist air, brush on a solution of 1/3 pound beeswax melted in 1 quart turpentine. Buff it with a towel to create a thin, hard coat.
  5. "Whip" frayed rope. Wrap a waxed length of string tightly around the rope’s tip about a dozen times. Tie off the loose end and trim the excess.
  6. Lube screws. Georgia Beekeepers’ Association president Robert Brewer rubs wax over the threads of screws to make them drive smoothly and resist corrosion.
  7. Condition a wood cutting board. Add a half-teaspoon beeswax to a cup of mineral oil, microwave until the wax melts, and apply the mixture to the board with a soft cloth.
  8. Polish concrete counters. Give a sealed, dark concrete countertop a muted, natural luster by rubbing melted beeswax over the surface with a chamois cloth. Let it dry and then wipe, says Fred Hueston, director of the National Training Center for Stone and Masonry Trades.
  9. Preserve a patina. Seal a copper sink by rubbing it with softened beeswax and polishing off the excess with a lint-free rag, says Shane Jost, owner of Mountains Edge Copperart.
  10. Waterproof leather. Combine equal parts beeswax, tallow, and neatsfoot oil (available online). Warm the mixture and use a rag to rub it on your work boots or gloves.

Article Source: TheOldHouse

Fiber Facts for Carpet

The type of fiber used determines the basic performance and appearance of the carpet. The fiber content is usually listed on a specification sheet on the back of the sample. Although there are dozens of different trade names, remember that products fall within one of five basic categories.


  1. Wool
    is the luxury and performance benchmark. It is softer than synthetics, is exceptionally durable and offers great stain resistance. But at $50 to $100 per square yard, it's not cheap. It accounts for only 3 percent of carpet sales.
  2. Nylon
    is a close second to wool in terms of durability and feel, but on average it costs a lot less ($18 to $35 per square yard). It has excellent soil resistance, colorfastness and resilience. Nylon accounts for nearly 60 percent of carpet sales. Some new offerings feature added wear and stain resistance. Others have carbon-composite nylon filaments woven into the yarn that eliminate shocks. Some of these enhanced nylons cost as much as wool.
  3. Olefin, or polypropylene,
    is both durable and water- and stain-resistant, making it a good choice for berbers (low, loop-pile carpeting) and indoor/outdoor carpeting, and in commercial settings. Because it is less resilient than nylon, it is best used in low-pile carpets; otherwise, it can mat or crush. It costs $9 to $16 per square yard.
  4. Polyester
    is noted for its soft hand, or texture, especially when used in a luxurious thick pile. It has good color retention and soil resistance, but it's not as resilient as nylon. It runs $11 to $19 per square yard.
  5. Acrylic
    offers the look and feel of wool, at a lower price—$10 to $15 per square yard. But because the fiber tends to fuzz and pill, it's not typically found in room-size carpets. This moisture- and mildew-resistant fiber is usually found in bathroom rugs.

Article Source: ThisOldHouse

Monday, October 30, 2006

How To Clean The Kitchen In 15 Minutes

A day can be completely eaten up by cleaning a kitchen. After breakfast, lunch, and supper, your kitchen can look like a disaster area in need of federal attention. We all know that if we leave our dishes and countertops until the morning, we need an ice pick to scrape off dried on food. After a long day few of us want to spend an hour scrubbing a room that is just going to need it again in 8 hours. Use this method to keep your kitchen running smoothly without making you feel rundown.


  1. Grab all of your needed supplies together
    Don't underestimate the value of this step. Trying to find cleansers, dishcloths, sponges, etc. not only eats up time, but increases the risks of distractions that let you forget what you were working on in the first place. Gather all supplies together before you begin.

  2. Run a sink of hot, soapy water.
    If you have a double sink with a garbage disposal on one side, make sure to use the disposal-free side. Keeping the disposal side free will allow you to scrape leftovers down the drain quickly while you work.

  3. Scrape off all the dishes into the trash or garbage disposal.
    If step 2 has blocked your disposal, scrape the dishes off onto a dirty plate.

  4. Place dishes that need to soak into the water.
    Try to choose the dishes that are going to give you or your dishwasher the most trouble to get clean. Put the heavily soiled dishes on the bottom. Large dishes like pans and bowls can be filled with hot soapy water and set on the counter to soak.

  5. While the dishes are soaking, go through the kitchen clearing out trash from your floor, countertops, cupboards, etc.
    Don't worry about things that are out of place, or don't belong in the kitchen. Worry only about trash.

  6. Move on to gathering all the items that do not belong in the kitchen. Put all these items into a basket (see supplies).
    If you have a helper (willing or unwilling) send them off to put away these items. Do not stop working on the kitchen to take these misplaced items to their homes.

  7. Put away all of the items that belong in the kitchen but are not in their proper places.
    Don't allow yourself to get distracted by rearranging cabinets, drawers, etc. Simply place the items that are out back where they belong.

  8. Load the dishwasher or wash by hand.
    If you do not have a dishwasher or don't like to use one, this process of cleaning the dishes may take more time. If possible grab a couple of other people and form a wash, rinse, dry and put away assembly line. This is a great way to catch up with family members. Empty the dirty water and scrape the plate of food off into the disposal if it was previously blocked. Add the plate to the dishwasher.

  9. Wash down your countertops, appliances, and sink.
    Rinse out sponges and rags. If needed put them in the dirty clothes. We're not heavy duty cleaning here. I literally mean wash down the visible surfaces. Don't open the microwave and scrub it out. We're not cleaning the crumbs out of the toaster. Quickly wipe it down.

  10. Sweep and mop, or vacuum.
  11. Take out the trash
    If the trash is full, or tomorrow is trash day, take the trash outside and reline the trash container so that it is ready for tomorrow's trash.


What You Need:

  1. Trash container.
  2. Basket for stuff that doesn’t belong in the kitchen.
  3. Dish soap.
  4. Other cleaners you normally use.
  5. Dishrag or sponge.
  6. Scrubber for stuck on food.
  7. Broom, mop, or vacuum.


Tips:

  1. The more people you have who live and eat in your home, the more time this process is going to take. But, you have an advantage, more people to make messes means more people to clean them up. Make cleaning up the kitchen after dinner a family affair. Divide the steps between your family members, and you really can have the kitchen done in a short time.
  2. Train your family members to clear and rinse their own plates after each meal. This simple act takes little time for each person, but saves so much time for the dish person later.
  3. Run a sink of hot soapy water before food preparation begins. As mixing bowls, cutting boards, knives, etc, become dirty, quickly wash them out to prevent food from drying and sticking.
  4. Create some "Family Clean up CD" and let each person contribute a favorite song. Kid's will be a lot more likely to help out if they feel they have some input into the job. Letting them choose the music can go a long way.
  5. This quick cleanup is designed for daily maintenance. It can also be used for a fast fix when unexpected company is on the way. Doing this routine will not substitute for the inevitable need to clean more deeply on a regular basis.

Article Source: Sarah Aquirre

Thursday, October 26, 2006

Stainless Steel Bath Sinks

Stainless steel sinks are not just for the kitchen anymore.

Some renovators are using this cool gray metal to bring a rustic, industrial design to the bathroom.

Who's Buying Them?
The trend is catching on in urban areas, where loft buildings create the perfect backdrop for this industrial metal. Others want a unique, cutting edge look for a high end contemporary home.

How to Blend It
Put a stone texture solid surface countertop underneath as a way to add contrast between a natural look material and a shiny metal bowl.

Why Stainless?
Stainless steel is considered very durable and easy to maintain, features that make it easy to adapt to the kitchen and bathroom. "Stainless has been a versatile material -- it doesn't chip, it doesn't stain," said Bruce Keclik, director of product development for Just Manufacturing, a sink, faucet and accessories manufacturer in Franklin Park, IL.

The shiny metal also reflects light. Since there typically is lighting over the sink, the metal will add a subtle sparkle to the room when the lighting is on.

"It's a different look for people," Keclik said. "I think the colors have somewhat run their course in the home and people are looking for something different."

How to Design with Stainless?
Those who are considering stainless should realize that it is a unique look and one that fits a contemporary design. While it can be blended into more traditional designs, the look has the clean lines that characterize contemporary.

Begin by deciding just how much stainless you want. Consider:
  • A countertop for one sink or two?
  • An all stainless countertop and sink?
  • A wood, stone, solid surface or laminate countertop with a stainless sink?
  • A polished or brushed stainless sink? Or, a combination of the two?
  • A his and her setting -- two separate single bowls placed in separate sections of the bathroom?

Other Tips
When using stainless for the counter and sink, make sure the two pieces are made of the same gauge of stainless steel. Otherwise, the sink and countertop may look different when placed next to each other, said Jim Brunetti, owner of Avenue Metal Manufacturing in Chicago, which makes custom sinks, countertops, walls and other products.

This design can be achieved by dropping a sink into a countertop opening or by having the two pieces welded together.

Article Source: Renovators Place

Define Your Kitchen Island Personality

The Family Gathering Place Island
One of the most popular island designs is the large island for family meals. This type of island requires plenty of space -- often 4-feet by 6-feet or larger -- and a durable countertop. Here are some optional additions:
  • 4 to 6 seats
  • A microwave, small refrigerator, a warming or cooling drawer.
  • A wine rack or cooler.

The Party Island
If large social gatherings are part of your personality, then add an island that will draw people to gather, sit and chat. Try a unique island shape, such as a 5 or 6-sided island that allows many people to gather round. Consider adding:

  • A elegant countertop.
  • Stylish pendant lights that dangle over the countertop.
  • A small refrigerator and/or wine cooler.
  • A veggie sink and warming drawer for appetizers.

The True Cook's Island
If cooking is your passion, then an island can become a full-fledged chef's center for the family or a baking station or a grand food prep area. Depending on the kitchen design, place the island in a central location between the main oven and refrigerator and the eating area. Optional features include:

  • A veggie sink.
  • A cooktop.
  • A warming drawer.
  • A nearby double wall oven.

Article Source: Renovators Places

Enhance Your Bathroom

designs and patterning with varied color combinations it is seen that there is a great variety in bathroom lights. Maximum people think on investment in lights of kitchen or any other room but if right kind of product is selected then it becomes very easy for investing in reasonable costs. The concept of bathrooms has changed as now it is not just a washroom but a place for recreation and relaxation. As there is an attention given to spa tubs and various types of showers it is necessary that bathroom lights should be given an extra attention.

Brighten your bathroom:
Just imagine your bathroom as never before beautiful and elegant with different types of lights and reflections. The types of lights are elongated, to the sides of the bathtub, or rounded by it or small lamps near the hand shower. Vertical fixtures have a quality of an enhanced brightness and they give a better mirror reflection. A light over the top of mirror is a common pattern but if it is to the side then the light is evenly reflected. The next task is fixing lights near the shower. If the size of a bathroom is small then there are fewer chances that extra light is required. If one wants o be more decorative then ceiling lights are also a good option. If the area of bathroom is big then ceiling lights are very useful and they provide more brightness. There are various cautions taken when it comes to decoration of children’s bathroom as they may try to touch the bathroom lights and it might be a risk so generally these types of lights have different types of switches and they are at a higher height.

Article Sources: Home Improvement Tips

Wednesday, October 25, 2006

How To Clean Countertops

Your countertop is your workstation. You need this area to look good so that when the guests come over, it is spotless. Yet, you also need to have a clean and stain free countertop to keep your food preparations safe. There are plenty of ways to stain a countertop. Some are harder to wash clean than others. Whether you thought of this or not when the countertop was installed is another story. Most types of countertops are easy to clean if you know how to do so.

There are several ways to clean countertops. Here, we will talk first about how to give a general clean to most any type of countertop. Here are some tips to remember.

Regular Cleaning Process:

  • Always use a mild dish washing detergent on the countertop. Plastic laminated countertops need to be washed in this manner. Use clean water to rinse off any soap that is left behind.
  • When cleaning a countertop, make sure to remove any types of appliances or cutting boards from it before you attempt to clean it.
  • Then, make sure that you wipe off the bottoms of these items before putting them back in place later.
  • Use a soft sponge to wash the countertop. Use this to wash the entire counter.
  • Make sure to get under the lip of the countertop and the backsplash area as well. Get in right next to the edges to clean the entire thing well.
  • Now, you will want to work on another area of the countertop so that the solution of soap will be allowed to sit for a moment or two on the countertop. This will make cleaning it much easier in the long run.
  • If there is debris or particles that are not coming off easily, apply pressure and use a more abrasive sponge. Be careful as you do not want them to cause scratches in the countertop.
  • Next, use hot water to rinse down the area. You are removing all of the soap as well as anything that has come off in the process. Then, use a terry cloth to dry it down. Or, you can allow it to air dry as well.
  • If it is recommended by the maker, you an often use a furniture style polish to give your countertops a bit of luster.

Heavy Duty Countertop Cleaning

  • Now, sometimes it may be a bit harder to get the grime off of your countertops. If this is the case, here are some things that you will want to consider.
  • Get a soft bristled brush as well as a pH balanced cleaner. There are commercial brands of them that will work well. They are scouring cleaners. Make sure that you test these out in a hidden area to make sure that they will not damage the surface of your countertops. You should always do this. If all is well, use them to scrub down the surfaces.
  • Follow the directions provided with the solution to insure that it is used correctly as well as cleaned off correctly.
  • You should be able to use a sulfuric or phosphoric acid to clean if this does not work. Make sure to follow the directions provided on these solutions to insure that they are used in the proper manner.

Article Source: Mrs. Clean

Tuesday, October 24, 2006

How To Plan For Kitchen Remodeling

Kitchen remodeling is one of the most desirable home improvement projects for many homeowners. A new kitchen increases the value of your home and makes your life easier. The first step to your new kitchen is to set a budget. Decide how much money you are willing to spend. This will help drive your other decisions. Be sure to leave a cushion in your budget for additional, unexpected expenses.

When determining your budget, consider how long you intend to stay in your home. If you are planning to sell in the next year or so, you may want to spend less money. Decide which features you must have in your new kitchen. You can cut corners in other areas by substituting less expensive materials for the counter tops, flooring or cabinet doors.

Research Kitchen Trends
Before you start planning your remodeling project, do some research on the current trends and designs being used in kitchens. Look for information on the internet or in home decorating magazines. Visit your local home improvement center for more ideas. Start a file for pictures of kitchens you love, furniture, appliances, fabric swatches or anything else you find interesting. This will help when you are ready to start purchasing items for your new room.

Options in Kitchen Remodeling
Cabinets are an expensive item in any remodeling project. They often take up half of the overall budget for the room. If you can't afford the cost of brand new cabinets, there are cheaper alternatives. Consider cabinet refacing rather than replacing the entire cabinet. In refacing, the doors are replaced and exterior wood areas are covered. This is much less expensive since you are using the same cabinets. An even cheaper alternative is to paint your existing cabinets and buy new hardware.

If you must have new cabinets, consider adding some extra features. Features such as tilt out drawers, pull out garbage cans or a lazy Susan inside a corner cabinet are great space savers and make the room more functional. The doors can be either solid wood, clear glass or stained glass. Shop around to find out what is available before making a purchase.

You can save money on flooring and countertops as well. Substitute vinyl flooring in place of more expensive ceramic tile to save money. If you can install ceramic tiles yourself, you can have them for about the price you would pay a contractor to install vinyl flooring.

Countertops vary widely in price depending on the material that is used. Counters that are more durable are also more expensive. You may want this if you want to be able to cut food directly on the counter. For most people, this is an easy way to cut the overall cost of your kitchen. You can find less expensive material that gives the look of marble, butcher's block or other expensive materials.

Once you have decided what you want, consider how much of the job you can do yourself. Contractors can eat up a large portion of your budget. The more you can do, the more you will save in the overall cost of the room. Use the savings for great new furniture.

Article Source:Johnathan Bakers

Monday, October 23, 2006

Kitchen Lighting

Kitchen lighting is a form of home lighting specifically for the functional purpose of a kitchen. In the kitchen several requirements need to be met and these must be aided by precise lighting. Thus kitchen lighting is mostly task lighting and ambient lighting and less of decorative lighting. Good kitchen lighting, from an aesthetic and functional standpoint, incorporates both ambient and task lighting.

From the perspective of a professional lighting designer, the kitchen is one of the more interesting and versatile projects one can tackle. Filled with numerous nooks and crannies, cabinets and appliances, shelves and other specialized areas such as islands, kitchens can present more lighting challenges than any other room in your home.

Start with the task areas. These are best lit with bright, shadowless light. Fluorescent tubes are particularly well suited for this. You want to get the fixture close to the task area so as to get maximum light concentrated on the area you wish to work. In kitchens this would be counters, sinks, and tables. Spot lights and directional lights also provide task lighting in kitchens. For pantries or other closets, small Under Cabinet Lights provide good illumination. They can be mounted inside the closet above the door header to provide glare free lighting on the closet contents.

Ambient light is the general, overall light that fills in shadows, reduces contrast, and lights vertical surfaces to give the space a brighter feel. Fluorescent tubes are well suited to the job of providing ambient light. They provide broad, even illumination and their efficiency makes it possible to fill the space with light without turning it into an oven. Incandescent down lights are more dramatic and give a brilliant white light but require several fixtures to avoid shadows in a kitchen.
Direct lighting is achieved by using conventional recessed lights, surface lights or light fixtures that are on a pendant or chain. These types of lights work well to provide bright lighting for work surfaces and general purpose lighting in the kitchen area. Rope lighting and small recessed lights are budget friendly.

Add a layer of accent lighting. You may be lighting artwork, architectural details, collectibles, or a food presentation area.

Kitchen occupancy sensors can be used in place of expensive complicated 3-way switches in kitchens with multiple entrances. If the sensors can “see” all the entrances from their mounting location, they will turn on the lights automatically whenever anyone enters the room from any direction.

The importance of kitchen lighting is often overlooked. The traditional kitchen has been replaced by a modern one where people interact in quietude over the counter. Thus kitchen lighting is evolving with the needs of modern households.

Article Source: Home Improvement Tips

Kitchen Cleaning Tips

A word of caution - Be cautious using orange-based cleaners to clean a kitchen. Some contain petroleum distillates. Petroleum distillates break down the rubber in the rubber gaskets around refrigerators and dishwashers.

For a wonderful all purpose fill a spray bottle half full with water add a squirt or two of Ivory Liquid dish soap then finish filling with water. It's inexpensive and does a great job cleaning kitchen surfaces without leaving a residue behind.

Standard Surfaces - The Ivory mixture cleans most kitchen surfaces and appliances.

Stain Removal - A 50/50 solution of hydrogen peroxide and water will remove most stains. Blot on the spot and let it set 30 minutes. Then scrub lightly with baking soda if needed. Shaving cream also does a great job on difficult stains.

Club soda will also help remove the stain if poured on immediately. Shaving cream does a good job. Spray on and allow to set 30 minutes. Tile stores carry a chalk like stick that is safe for any color grout. Drag it across the stain and remove after an hour or so. Reapply if necessary.

Keep a good sealant on the tiles and especially the grout. You'll find good sealants at tile stores.

To remove burned on food from the surface of a stainless steel stove, boil some water (wear gloves) and pour directly onto the spill. Let it set a few minutes. That helps loosen the food making removal easier. In microwaves, wipe them down with boiling water then scrub with Cameo. Cover your food to prevent the splatters.

Use Cameo to clean stainless steel cookware as well. Remove burned on food by first boiling water in the pan. Never cook on high heat with stainless cookware. Use medium heat only. And never let the pans boil dry.

Appliances
Vertical surfaces clean easier with a foaming tub and tile cleaner like Dow Foaming Bubbles. It adheres to the surface giving the cleaner time to break down the grease or dirt. Leave scrubbing for those who don't know better. You won't find me using elbow grease under the hood of the stove, refrigerator walls, ice chest - you have the idea.

Refrigerators - Odors are caused by hidden food particles. Make sure to clean under the rubber gasket, but first, use the foaming bath cleaner on the walls, wiping them down with a baking soda, vinegar and water combination. Use about a quarter cup of vinegar and one or two tablespoons of baking soda for each quart of water, though you don't have to be too precise. The combination fizzles, but it should zap the smell. The smell lingers? Check for Freon leaks.

Dishwashers - Remove the spindles and drawers, clean under them and under the gaskets to get rid of odors. Fill one dispenser with Tang instant drink mix and the other with automatic dish soap and run the dishwasher empty through just the wash cycle. This combination cleans and deodorizes the inside. I'm not sure how the Tang works, it just does.

Small Appliances -Sprinkle a little baking soda on a damp towel to clean without scratching.

Microwaves - To clean that baked-on mess in your microwave, place a coffee cup half filled with water inside and cook on high for two minutes. The water steams the inside, loosening the hardened splatters. Spray with your Ivory soap cleaner and wipe dry.

Disposals - To freshen, pour baking soda on your scrub brush and scour the inside.

See the Floor Care sections on Vinyl, Marble, Ceramic, Slate, Wood and Laminate Floors to learn the proper method of taking care of your hard surface floors.

Excellent window and mirror cleaner : In a 32 oz. spray bottle add 1/3-cup vinegar and ¼ cup rubbing alcohol. If you absolutely must have another cleaner add 1-tablespoon automatic dishwashing detergent.

Article Source: Doityourself.com

Tuesday, October 17, 2006

Prepare your house for Fall

Even if it’s still hot where you live, fall is definitely on its way, so it’s time to get your house ready for the change of seasons. Getting some this preparation done in advance means you can spend time on outdoor projects when the weather finally does turn cool. Besides that, once all this work is done, you can concentrate on fun projects for the holidays – maybe a new makeover for your dining room?

A pretty house is nice, but a functional, clean, and well-maintained home is a real joy. It’s also safer for you and your family. Clip this checklist and post it on the fridge (ahem, I mean the new corkboard you’re going to install!) to help keep you on track for all your fall home preparations.

Do important cleaning and maintenance

  • Call your heating and air conditioning company to come out and light your heater pilot and check your heating unit. Don’t wait until it’s cold or you’ll be in line with everyone else.
  • Check seals and weather stripping around doors. This will help stop drafts and keep bugs out.
  • If you have a wood-burning fireplace, have your chimney cleaned and inspected to prevent chimney fires or smoke back-ups.
  • Do paint touch-ups outside and inside your home.

Make necessary changes
  • Change household filters, such as water filters, whole house water filters, and air conditioning filters. Buying a three-month air filter will take you into the winter season. Try to change these at marked times, such as change of seasons or when we change our clocks to help you remember when to make the changes. Purchase new batteries for smoke detectors and have them ready for the Daylight Savings time change on October 30th.
  • Install smoke detectors if you don’t have them.
  • Dust your smoke detectors and used canned air to clean dust out from the inside of your smoke detectors if there is any build-up.
  • Consider adding a carbon monoxide detector if you have a gas heating unit.
  • Clean out the pantry. Throw away old or unused food items and clean or replace shelf liner. Consider using a plastic coated shelf liner that can be cleaned as needed.

Organize closets, cabinets, and garage

  • Install organizers in spice cabinets and pantries to make holiday cooking easier and create more storage for baking and cooking needs.
  • Buy and install closet organizers to straighten out messy closets.
  • Purchase 10 sets of plastic hangers and then replace as many wire hangers as possible. Wire hangers bunch up your clothes and make them hard to find.
  • Organize the garage and get ready to bring all the outdoor things like patio furniture indoors for the winter. Install shelving and purchase tubs to hold miscellaneous items in the garage. Give the garage a good cleaning by washing the floor, wiping down the walls with a broom to remove cobwebs and cleaning the windows.

Clear out excess

  • Clear the clutter. Clutter collects dust and it makes it hard to clean.
  • Clear off the tops of everything you can – kitchen counters, dressers, bathroom counters, etc.
  • Go room to room and clear out excess clutter and unused items and then schedule a garage sale.
  • Donate items to your favorite charity and get the tax deduction before the end of the year rush.
  • Make a space for holiday purchases now before you start bringing them home.

Clean up

  • Clean light fixtures and chandeliers before holiday parties and family dinners.
  • Get silver polished and china washed and it will ready for your holiday dinners and will be one less thing you have to do then.
  • Schedule to have your carpets and upholstery steam cleaned.
  • Turn mattresses, and then take comforters and bedspreads to the cleaners for dry cleaning or laundering.
  • Wash silk plants while the weather is still warm and they can dry outside. You can spray these with a hose or you can spray them off with a nozzle in the shower.
  • Clean the surfaces in the kitchen. Make a corkboard area close to a phone or desk area where pizza coupons and fridge art can go to clean off the refrigerator. Next, clear off the counters of anything you haven’t in the past week. This will give you more space and look neater, too.
  • Clean exterior surfaces and wash sidewalks, front porch, and windows before the weather turns cold and you can’t get them cleaned.

Article Source: BellaOnline

Thursday, October 12, 2006

What is solid surface?

Solid surface is an acrylic material manufactured into flat sheet panels and designed for use in interior and exterior applications. It is suitable for a wide variety of residential and commercial applications including kitchen counter tops and bathroom vanities, restaurant table-tops and work surfaces, hospitality areas, healthcare, banks and other corporate environments.

Solid surface sheets may be bonded to each other to create a continuous, seamless surface that is suitable for both horizontal and vertical use. Most solid surface materials combine two main ingredients: a natural mineral, which serves as the filler, and a resin, which serves as the binder. These are combined and then cast in a curing process that results in a sheet or a shape.

The most common mineral is alumina tri-hydrate, or ATH. ATH is a refined form of bauxite ore and can comprise up to 75 percent of a sheet of solid surface. Bauxite is a form of clay.

ATH is chemical and stain resistant, water-resistant, fire resistant, translucent and is hard enough to give impact-resistance, but soft enough to be machinable.

Other materials have been used as fillers for solid surface. Calcium carbonate glass fibers and even recycled newsprint have all at one time been used as fillers.

Two main resins used in the manufacturing of solid surface are acrylic and polyester. A purely acrylic-based resin yields a sheet that is thermoformable. It can be heated, bent into a new shape and cooled without any loss of performance characteristics.

Polyester resins, including those that are mixed with acrylic, are used in demanding or high strength applications. With the addition of a catalyst, usually peroxide, the sheets are then cast and cured.

Casting of solid surface consists of mixing the resin with fillers and additives. The mix is poured into an open mold. Occasionally, molds are closed for products with shape. In casting, air bubbles should be avoided by either adjusting the viscosity of the mix or vibrating the casting table. Air bubbles in the material cause voids once the material is cured.

Some solid surfaces cure in the open air. Steam or ovens are sometimes used for curing. Many polyester resins require a heating-cooling cycle after curing, which increases the degree of cure. An improperly controlled cure can cause air bubbles appearing in the material, which effectively ruin it as a solid surface. Carefully controlling temperatures during curing is an effective way of reducing this risk.

Features and Benefits
• Durable: resists chipping and cracking and retains its beauty
• Renewable: scratches, cuts and burns can be sanded away
• Available in classic solid colors and versatile patterns
• Homogeneous composition for color and pattern retention throughout the thickness of the sheet
• Offers seamless, one-piece appearance
• Stain-resistant and easy-to-clean
• Nonporous and hygienic: dirt can’t be trapped, liquids won’t penetrate, bacteria and fungi won’t grow

Article Source: Moden Woodworking

Solid Surface Installation Guidelines

When working with solid surface products, it is important to remember that the fabrication techniques used will affect the appearance and performance of the finished installation. Training, which specifically addresses solid surface fabrication and installation, is recommended.

Proper conditioning of the solid surface sheets, along with other materials being used in the assembly, will minimize shrinking or expansion of the final installation. Ideally, all components should be conditioned at 70° to 75°F and relative humidity at or below 45% for 48 hours prior to installation.

Corner joints should be made square rather than mitered. This minimizes material usage and facilitates installation. To prevent stress cracking, seams should be placed at least 3” (76.2 mm) away from any corner or cutout.

All joints should be reinforced with a 4” (101.6 mm) wide strip of solid surface material and supported by framing. Joint edges should be straight, smooth and clean. To minimize the potential for stress cracking, exposed edges of the reinforcing strip should be chamfered.

For cutouts, use a router equipped with a sharp 3/8” (9.5 mm) diameter (minimum) carbide bit. The corners of a cutout must be rounded to a 3/16” (5 mm) radius and smoothed on both top and bottom. Inside corners require a smooth 1/2” (13 mm) radius. Larger radii are recommended whenever possible.

Solid surface is compatible with many commercially available caulks and sealants; however, a specially-formulated solid surface adhesive is required for making joints, repairs or custom edges.

Install countertops on perimeter framing support (without added substrate), using small amounts of silicone sealant.

Sheets of solid surface may be installed vertically over suitable substrates such as marine-grade plywood, water-resistant gypsum board and ceramic tile. Neoprene-based panel adhesive or white or clear silicone may be used. DO NOT USE WATERBASED ADHESIVES.

The recommended expansion clearance with uncaulked solid surface sheets is 1/32” (.8 mm) for every 8’ length. Joints to be caulked should be approximately 1/8” (3 mm) wide to allow for caulk penetration and expansion.

Article Source: Modern Woodworking

Bathroom Cleaning Tips

Windows and Mirrors
In a 32 oz. spray bottle, add 1/3 cup white (clear) vinegar and 1/4 cup rubbing alcohol. If you absolutely must have another cleaner, add 1 tablespoon automatic dishwashing detergent.

Tubs and Shower Stalls
Alkaline deposits in the water cause those not so pretty spots on your glass doors and shower walls. Apply a car wax to the walls and doors, but not the floor or it gets real slick. Both fiberglass and glass are porous. The car wax seals those pores, which makes cleaning easier and keeps water spots away. Reapply twice yearly.

Squeegee or wipe down your shower after each use to further prevent buildup. If you're tired of fighting the soap scum buildup, switch to liquid soap, natural soap or Dove. It's the talc in most bar soaps that causes the buildup. Changing soap can eliminate the buildup. You still need to clean the shower once a week, but the job is easier.

Clean the showers once a week with an orange citrus based cleaner. Spray on and give it ten minutes to dissolve the dirt. Why do all that scrubbing when your product does it for you?

OK, so the soap scum refuses to budge and friends are coming for a visit. Use your orange based cleaner concentrated. Pour plenty on an old dishrag and wipe on the walls and doors. Use can use boiling hot white vinegar (wear gloves) but you must keep applying it as the white vinegar dries. It takes time to dissolve that buildup.

Patience now becomes a virtue. Wait and wait and wait some more. Go clean the rest of the house. If the cleaner starts dripping down the walls, wipe it back on. Check the walls with a fingernail. If the residue removes easily, round one is about over.

Use a white bristle pad to scrub. They look like fibers and are glued to a sponge. Use the white ones only. The colored scrubbers are coarser and do scratch. Test a spot to make sure it won't scratch the fiberglass. Dampen the pad, keeping it good and wet and gently scrub. This removes the soap buildup and most of the white mineral deposits on the glass doors. Nothing removes the etch marks themselves, but further damage is halted. Reapply the orange citrus cleaner if necessary.

Plastic shower curtains can be machine washed. Remove, spray with your diluted orange based cleaner and wait about 10 minutes. Wash with your rags and they come out quite clean. Air dry. If the curtain is long enough, cut off the seam at the bottom to prevent mildew buildup down there.

Toilets
Ring around your toilet? Again, alkaline deposits cause those nasty rings. Depending on the hardness of your water, pour one or two cups of white vinegar into the toilet once a month to eliminate the problem.

Toilet bowl rings - Here I take a deep breath and plead with you to follow these instructions. Repeat. Follow these instructions. Do not deviate or you will scratch the inside of your toilet bowl.

Turn off the water flow to the toilet and flush to remove the water. Saturate a couple of heavy duty paper towels with white vinegar or the Orange Citrus Cleaner. Place around the edges making sure all areas are covered. Keep the towels damp for several hours, even overnight, until the water spots start dissolving. Then scrub with a stiff nylon brush.

If the white vinegar does not dissolve the whole ring, go to a janitorial supply store or a hardware store and purchase a pumice stone and a stiff toothbrush. Dampen one end of the pumice stone and keep it wet.

Gently, very gently, rub the pumice stone across the lines. When enough pumice builds on the sides, switch to a stiff bristle brush to continue working. Rub gently until the deposit disappears. Pumice will scratch the toilet. Use it only one time and cautiously.
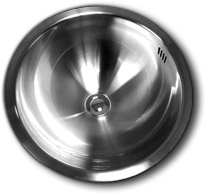
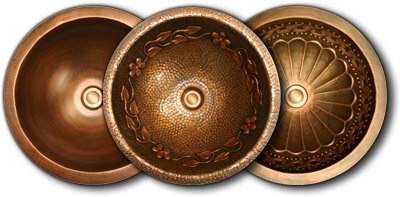
Sinks
Once a month, pour one cup of baking soda, followed by one cup of white vinegar down the drain. Wait an hour and flush with warm water. The combination fizzles away most of the buildup. Works for shower, tub and kitchen sink drains as well.

Faucets
Water deposits build up around faucets and drain areas. Use a paper towel soaked in white vinegar and place around the faucet. Plug the drain and pour 1/2 cup white vinegar in the sink and wait. It takes time for the white vinegar to dissolve the alkaline deposits. Scrub using a stiff bristled nylon toothbrush.

Do not use orange based or powdered cleansers on brass or gold plated faucets. These fixtures corrode and scratch quickly. Dry these faucets after each use to prevent water spot damage.

Mildew
Keep ahead of mildew so it doesn't become a problem. Every six months spray your bathroom ceiling with a 50/50 solution of hydrogen peroxide and water. Peroxide is a safe bleach and won't harm the environment or your lungs. Find larger quantities of peroxide at beauty or medical supply stores.

Spray the mixture on and leave it. No need to rinse or scrub. If you currently have mildew, follow the above directions. Wait two hours and respray. Then wait 24 hours and spray a third time if necessary.

Article Source: Doityourself.com

Wednesday, October 11, 2006

Clogged Drains?

Ever suffer from a backed up kitchen or bathroom drain? Of course you have -- and you know what a mess it can be to clean them out.

You may be able to avoid some future clogs may if you follow a few tips from the American Society of Home Inspectors.

  • Pour a pot of boiling water down the drains every month and a pot of hot water plus a half-cup of baking soda down the garbage disposal to help prevent clogging. Also, keep pop-up sink drains and strainers clean and free of debris.

  • Keep fat, grease and coffee grounds out of drains and dishwashers.

  • Never pour paint or chemicals down drains. They can cause damage to pipes or interfere with the proper functioning of the septic system.


For the pipes and plumbing itself, ASHI recommends homeowners do the following:

  • Check all fixtures -- tubs, shower stalls, sinks, basins and toilets. Make sure they are free of cracks, rust and other forms of surface damage.

  • Remain aware of pipes that have been patched. Those should be replaced as soon as possible, since patches are meant to be temporary and may not hold out over time.


These few tips may save you the trouble and expense of calling a pro when you get in a jam.

Article Source: Oldhouseweb

Solid Surface Tops Make Great Kitchen Countertops


If you're looking to do something different in your kitchen, you might want to consider the option of a solid-surface countertop.

Solid surface tops are manufactured from specific polymer blends, chemically engineered to be resistant to stains and acids. Besides good looks, solid surface material offers a number of benefits when used as a kitchen countertop. The material is solid color throughout; the color and pattern go all the way through the countertop. This differs from a plastic laminate top, which only has a surface layer of material over a substrate of plywood or particleboard, and even ceramic tile, which has a glazed color layer over a white core.

This translates to a top that is extremely durable and easy to maintain and repair. The material is non-porous and naturally resistant to a number of stains, so routine maintenance typically involves only washing with a damp cloth. But should you stain, burn or scratch the surface, you can literally sand it off. Depending on the severity of the stain, you can use anything from abrasive household cleanser to fine sandpaper to remove the discoloration.

A Look at the Options
You will find solid surface tops in a variety of colors and patterns. There are solid colors ranging from white and almond to several different colors. Solid surface materials are typically available in 1/2", and 3CM thicknesses. The 3CM materials are best for countertops, with the 3CM material being able to span greater distances unsupported. Refer to the manufacturer's specifications for specifics on span and weight-bearing capabilities.

Fabrication and Installation
For the experienced do-it-yourselfer, solid surface polymer materials can be cut and shaped with most types of standard woodworking tools, including table saws, jig saws, routers and drills. Carbide-tipped cutting tools are recommended. The material is hard and dense, and is somewhat similar to working with a hard, straight-grained wood such as maple. Fabrication takes care and patience, and you need to wear eye protection to guard against the possibility of flying chips.

Special seam kits, available from your material supplier, are used to join the pieces together at the corners and other areas. This is a two-part material similar to epoxy, and when done correctly, it produces a flawless seam that is virtually invisible. Read all manufacturers' instructions in advance, and follow them exactly for best results.

A better option is to have the tops professionally fabricated. After your cabinets have been installed, the fabricator will measure the exact size of each cabinet run, and will custom-make the counters to fit, including making cardboard templates of curves and complex areas as necessary. The tops are final trimmed on site, and backsplashes and other components are added to complete the installation.

Another advantage to having a pro do the work is the availability of a wider variety of custom edge treatments. You can choose from simple square or curved edges, or thicker and more complicated routed edges. You can also select from a wide variety of inlays to accent the front edge, ranging from simple color stripes to inlays of brass and other materials.

Article Source: Doityourself.com

Tuesday, October 10, 2006

Cleaning the Mold

If the surface(s) you are cleaning are dry, or mostly dry, you should lightly mist them with water before cleaning the mold. If the mold is too dry, then the mold spores will have a much better chance of becoming airborne while being disturbed during the cleaning process.

Once the surface is lightly misted (if necessary), then clean the affected area(s) with soap to remove as much of the mold as possible, and then apply a disinfectant to kill mold spores that are left behind (Review of Mold Disinfectants). Thoroughly clean all surfaces in the area that contain visible mold, and even surfaces that do not have visible mold, since mold spores are microscopic very durable, and can remain dormant for months or even years.

Once a surface has been cleaned and disinfected, it should be completely dried.

In which case, if mold spores are left behind, and are introduced to moisture again in the future, then you will have another significant mold growth problem on your hands.

Non-porous material such as solid surfaces, metals, glass, hard plastics, and semi-porous materials include wood, concrete, etc, that are structurally sound with some visible mold growth may be cleaned and reused.

If the contamination is not too severe, porous material may be cleaned and reused. If the damage is extensive and the mold growth has visibly destroyed porous items beyond repair, they may need to be removed and replaced. Examples of porous materials are ceiling tiles, insulation, wallboards, carpet, soft furnishings, clothes, papers/books, etc.

All material that has been cleaned should be completely dry and visibly free of mold before it is reused and before sensitive individuals are exposed to it.

Article Source: Toxic Black Mold Inrfomation Centre

Friday, October 06, 2006

Benefits of Stainless Sink


Stainless steel has emerged as the most popular choice of materials for new sink installations because of its low cost, light weight, and almost unbreakable construction. Stainless steel sinks are made in many sizes and several thicknesses, measured in gauge.

The gauge of the stainless steel is the thickness of the stainless steel sink. The most common gauges are 18 and 20. The higher the number gauge, the thinner the steel. Eighteen is the most recommended gauge for sinks.

Stainless steel kitchen sinks are easy to clean and will stay looking newer for longer when cared for properly. You won’t have to worry about leaving lemons in the sink overnight or cranberry stains, but it can become dull and scratched. It is best to put a plastic or rubber mat in the sink to protect it from scratches. A mat will protect the shiny surface and keep it looking new longer.

When choosing a kitchen sink, there are many different decisions that need to be made. Even the simplest of sinks are available in different styles and colors. The first consideration is the size. Make sure that your sink fits.

Sinks are made with various qualities of stainless steel. Light-gauge stainless steel is more vulnerable to denting and scratching.

Stainless steel is also available in a mirrored finish, which gives it a shinier appearance. In brushed-stainless finishes, which is the latest trend, scratches are less visible.

Kitchen sinks come in one bowl, two bowl, or three bowl models. The bowls can be deep or shallow. Single bowl sinks are basic, and their depth can vary from 10” to 12”. Two and three bowl sinks allow for multi-tasking. For example, you can rinse or store dishes in the large bowl, and use the small bowl for a garbage disposal or to rinse vegetables.

Article Source: Jason Gluckman

Benefits of Solid Surface


Solid surface is a 100 percent manmade product, which means great diversity when it comes to color and texture variations. It is made of resin, an acrylic or modified polyester; alumina trihydrate, a filler which allows for a Class 1 Fire Rating; color pigments; and added particles that give a mottled, veined, or textured look to the surface. Solid surface is machinable and can be cut into about any shape imaginable. It also can be heated and molded. Solid surface is the only material that features molded sinks seamed directly to the countertop with no gaps or caulks. Built-in coved backsplashes can be fused to the countertop to create a water-tight transition.

Various additives allow for the creation of hundreds of looks, from speckles of granite particles to the swirls of a marble vein. Surfaces are available in finishes from dull matte to high gloss.

Solid-Surface Benefits
Solid-surface kitchen countertops offer homeowners the benefits of a warm-to-the-touch surface with low maintenance requirements. Normal wear and tear requires only soap and water cleanup.

Solid-surface products offer these benefits:
  • Stain and chemical resistance
  • Scratch resistance
  • Easy cleanup
  • Durability—The product is "homogenous" meaning the color and pattern are consistent throughout. There are no veneers to chip, crack, peel, or wear out.
  • Long warranty. Solid-surface products generally come with a 10-year warranty.

Solid surface is manufactured to be stain, chemical, and scratch resistant, but it is not impervious to harm. It can be scorched and may crack if incorrectly installed too close to a high-heat producing appliance or if hot pans are placed on it. To prevent damage, homeowners are encouraged to use trivets or hot pads.


Wine, mustards, and other high stain producers could leave a mark if not quickly wiped up. Solid surface can be scratched and cut so homeowners are advised to use cutting boards. Damage can be repaired and the product restored often by using a non-woven scrubbing pad—such as Scotch Brite—or an or abrasive liquid cleanser followed by the pad to maintain the same appearance as the rest of the countertop. Always check with the manufacturer for their specific care instructions since care and repair options vary depending on the finish and the degree of repair needed. Deep scratches will probably require professional services, but repairs for cracks or chips can be practically invisible.

Copper Facts


Copper is the most versatile and durable of all metals and has been called "man’s eternal metal". Copper is malleable, ductile and long lasting. Copper is a better conductor of heat and electricity than any other metal except silver. Without copper, there might never have been an electric light or space flight. This miraculous mineral and its alloys are at the heart of all technology, from telecommunications to transportation.

  • Copper is everywhere – take a minute and look around you. It is in what you see and often in what you don’t see. It’s behind the walls of your
    home, in electrical and telephone wiring. It’s in computers, refrigerators, microwaves and automobiles.

  • The average home today contains about 400 pounds of copper for electrical wiring, water pipes and appliances, while the automobile you drive
    contains about 50 pounds. Each child born today in America will need 1500 pounds of copper in the course of his or her lifetime to enjoy our
    current standard of living.

  • Did you know? – When zinc is alloyed with copper, brass is made. And when tin is alloyed with copper, bronze is made.

  • Copper Fact – The Statue of Liberty contains 179,000 pounds of copper. After one hundred years of enduring biting sea winds, driving rains and the
    beating sun, the copper skin of the Statue of Liberty not only has grown more beautiful, it has remained virtually intact. The weathering and
    oxidation of the copper skin has amounted to just .005 of an inch in a century.

  • Did you know? – Today’s U.S. coins, dimes, quarters and half dollars have a solid copper core and an outer layer of a copper-nickel alloy.

  • Copper’s Future – One of copper’s major advantages is that it is recyclable. In North America alone, approximately one half of the copper consumed
    annually comes from recycled material. Copper’s recycle value is so great that premium-grade scrap has at least 95% of the value of primary copper
    from newly mined ore.

Thursday, October 05, 2006

Ten things you should know about mold


  1. Potential health effects and symptoms associated with mold exposures include allergic reactions, asthma, and other respiratory complaints.

  2. There is no practical way to eliminate all mold and mold spores in the indoor environment; the way to control indoor mold growth is to control moisture.

  3. If mold is a problem in your home or school, you must clean up the mold and eliminate sources of moisture.

  4. Fix the source of the water problem or leak to prevent mold growth.

  5. Reduce indoor humidity (to 30-60% ) to decrease mold growth by: venting bathrooms, dryers, and other moisture-generating sources to the outside; using air conditioners and de-humidifiers; increasing ventilation; and using exhaust fans whenever cooking, dishwashing, and cleaning.

  6. Clean and dry any damp or wet building materials and furnishings within 24-48 hours to prevent mold growth.

  7. Clean mold off hard surfaces with water and detergent, and dry completely. Absorbent materials such as ceiling tiles, that are moldy, may need to be replaced.

  8. Prevent condensation: Reduce the potential for condensation on cold surfaces (i.e., windows, piping, exterior walls, roof, or floors) by adding insulation.

  9. In areas where there is a perpetual moisture problem, do not install carpeting (i.e., by drinking fountains, by classroom sinks, or on concrete floors with leaks or frequent condensation).

  10. Molds can be found almost anywhere; they can grow on virtually any substance, providing moisture is present. There are molds that can grow on wood, paper, carpet, and foods.